One of the more enjoyable parts of my walking life comes when I publish the results on the Web. For me, part of the thrill is knowing that I'll be able to go back in years to come and remind myself of the good (or bad) times, and being English, I thoroughly enjoy wallowing in nostalgia. But another happy aspect is when people get in touch and say they really like my site... and then ask, by the way, just how did you create those cool maps showing your walking route?
Well, for those with a reasonably technical bent, here's a quick overview. I'm going to assume you're reasonably familiar with the way the Google Maps API works; if this means nothing to you, then you clearly have a life and might want to go off and enjoy it instead of ploughing through the rest of this article, but if you're interested in knowing more, I highly recommend Mike Williams' excellent Google Maps API Tutorial for more details.
My Maps

Getting your route online can be a bit of a trauma, especially if you haven't already done your walk and recorded it on a GPS. With this in mind, I designed my tubewalking routes digitally from the start, and to test the process, I started by producing a geographical map of the Tube lines themselves.
First up, I needed a decent paper map of the Underground. The iconic Tube map is a start, but it's only schematic and bears little relationship to the geography of the Tube, so I bought a set of Ordnance Survey Explorer maps covering London to 1:25,000 scale. These maps show all the Tube stations, and when the Tube lines are above ground they show the lines too, so armed with a general idea of where the Tube lives, I set off to map the Underground in Google Maps.
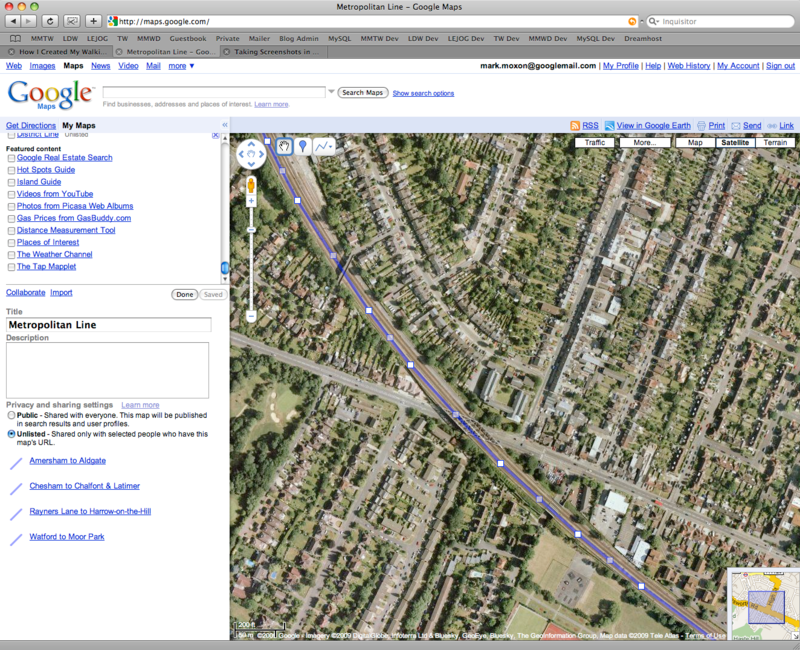
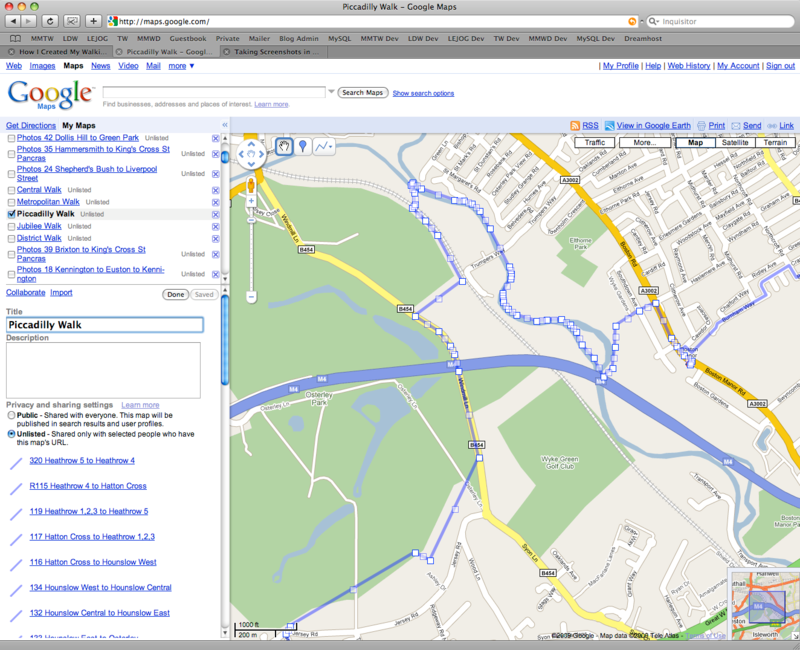
As if reading my mind, Google added a new feature to Google Maps just as I was starting to think seriously about digitising my tubewalk. This feature, called My Maps, allows you to create routes and points in Google Maps and save them, all using a standard web browser. So I started by creating a point for each Tube station, and simply drew straight lines between the stations, one for each of the 300+ legs of my tubewalk. Then, for each leg, I edited this line to follow the geographical route of the Tube, and I eventually ended up with a geographical map of the Underground, all saved in My Maps.
Using the Google Maps API

But how can you get a route in My Maps onto your own website? The answer lies in My Maps' ability to export your maps to Google Earth. Click on the 'View in Google Earth' link and your browser will save a KML file to your computer that you can load into Google Earth to view your map; look inside this KML file and you'll see a URL pointing to your map on the Google server, and if you replace all the occurrences of & with an unescaped & and then paste the resulting URL into your browser, your browser will save a KML file to your computer containing all the points and routes you've painstakingly entered into My Maps.
If you've got a decent text editor and know how to use search and replace, it's fairly straightforward to convert your KML file into XML, ready to be sucked into your Google Maps mash-up and displayed on site. That's how my 2D map of the Underground works, by importing an XML file mapping out the entire Tube network and displaying the results using the Google Maps API. The XML file in question is a fairly hefty 704 KB in size, but load it into your browser and view the source, and you'll be able to see that it contains a <station> node for each station, a <section> node for each tubewalk and a <tube> node for each Tube line.
Having entered the Tube lines, I used an identical system to enter my walking route, though this time I used various maps and guidebooks to design the route before entering it into My Maps. Some of the sections weave around to take in the sights and some are more direct, but technologically speaking they're all routes in My Maps, just like the geographical Tube map I created above.
Storing Routes in a Database
This system of loading flat XML files into Google Maps works fine, and it's how the maps on my Land's End to John o'Groats site work (though when I digitised these routes, My Maps didn't exist, so I had to write my own, extremely crude version, which did the job, but only at the cost of my sanity). However, things are a little more involved on my Tubewalker site, because I wanted to build a tubewalk planner that could take an arbitrary sequence of Tube stations and output the walking route between them.
So, instead of static XML files, I put all my route information into a MySQL database and wrote a PHP application that accepts a list of station numbers (starting at 0 for Acton Town, 1 for Aldgate and so on) and returns the XML for the walking route between those stations. This XML is in exactly the same format as the static XML I discussed above, but it's dynamically generated.
To take an example, consider the route on the Metropolitan line from Aldgate to Liverpool Street to Moorgate. In my database, these stations have IDs 1, 138 and 150 respectively, so the URL to display the walking route is:
Under the bonnet, map.php takes the route parameter and passes it on to another PHP application, map_xml.php, which returns the XML for this route (again, you might have to View Source in your browser to see the XML if you click on this link):
This is passed into the Google Maps API in the same way as the static XML file I used for the geographical Tube map, and it works because the XML loader simply takes a URL as an argument, and it doesn't care whether this points to a static file or dynamically generated XML. I also added shortcuts for the line names, so:
shows the whole Metropolitan line, and I also added in nodes to the dynamic XML for points of interest and photographs. Finally, I coded up a custom map control, the 'Display options' button, that switches the various elements of the map on and off... and that, in a very tight nutshell, is how my maps work.